
There’s nothing more irritating than sitting down for a call, gaming session, or video recording only to realize your microphone and speakers have suddenly stopped working. That’s exactly what happened to me while I was about to start gaming — I suddenly realized that both my speakers and microphone had stopped working without any warning. Fortunately, I was able to solve the issue in no time. Today, in this guide, I’ll show you how Driver Booster helped me fix the issue and also share some alternative solutions you can try to resolve it quickly. Make sure to read this guide until the end so you don’t miss any important steps.
Part 1: Common Causes of Microphone & Speaker Failure
Before mentioning the fixes, I want to explain some of the most common reasons why your microphone and speakers might suddenly stop working. Understanding these causes can help you quickly identify what went wrong and choose the right solution:
- Outdated Drivers: One of the most common reasons behind microphone and speaker failure is outdated or corrupted drivers. When audio drivers are not updated, they may stop communicating properly with your system.
- Wrong Audio Device Selected: Another common issue is when the system automatically switches to the wrong input and output devices.
- App Permission Issues: Some applications require permission to access your microphone. If these permission is disabled, your mic and speaker might not work with the app.
Part 2: Fix 1: Update or Reinstall Audio Drivers
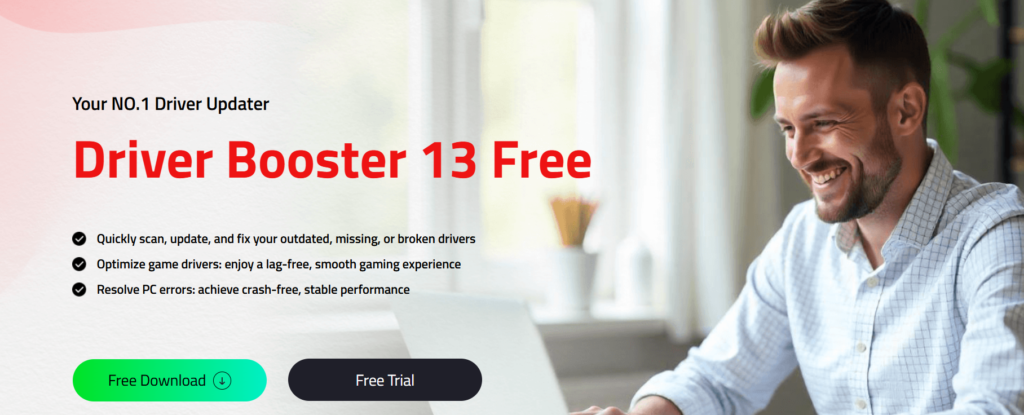
For me, the solution was simple — my speaker and microphone drivers were outdated, which turned out to be the main cause of the issue. Manually updating the Windows drivers can be time-consuming, which is why I decided to use Driver Booster. It is an all-in-one driver management program that automatically detects the outdated or corrupted drivers on your PC and installs the latest version without any technical expertise. It not only saves time but also reduces the risk of installing incorrect drivers, making the whole process much easier and more reliable.
Key Features of Driver Booster
- Driver Updater: Driver Booster automatically scans your system and updates outdated, missing, or corrupted drivers with just one click.
- Wide Range of Drivers: The program supports over 18 million drivers, including audio, graphics, network, chipset, microphone, printer, and more.
- Twin Certification: One of the best parts about Driver Booster is that all the drivers available on this program are certified with both WHQL and iObit Test.
- Free Version: Driver Booster offers a free version, allowing users to update outdated drivers without any cost.
- Intuitive Interface: The program provides a simple and user-friendly interface, allowing users to update drivers with a single click — no technical expertise required.
Step-by-Step Guide
As I’ve mentioned earlier, Driver Booster offers a simple interface, making the process seamless. This driver updater takes the hassle out of finding and installing the latest drivers manually. Here is how to update drivers with this program.
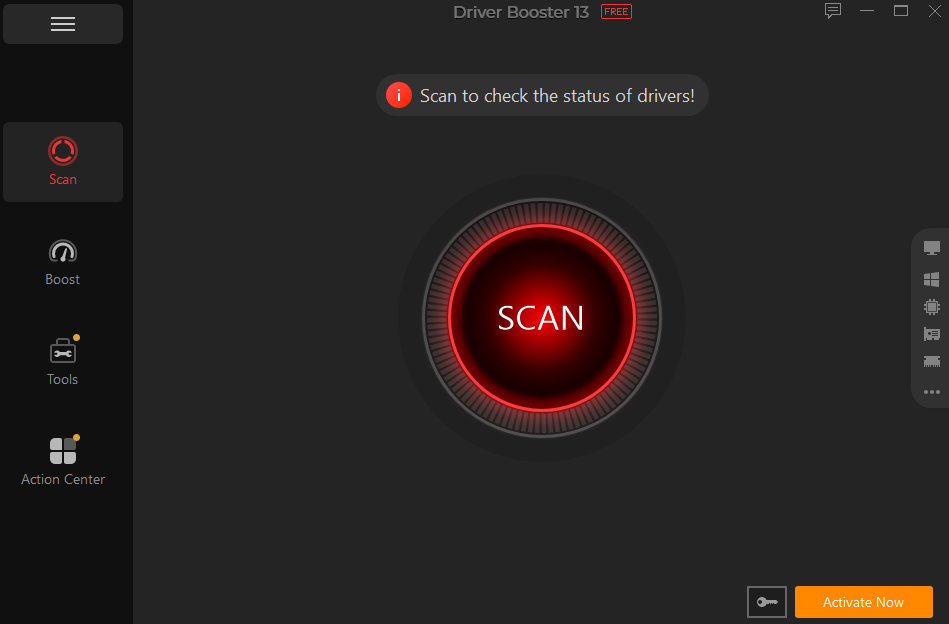
- Download, install, and launch Driver Booster 13 on your PC. Click on the “Scan” button to begin the process, and the software will automatically analyze your system for outdated drivers.
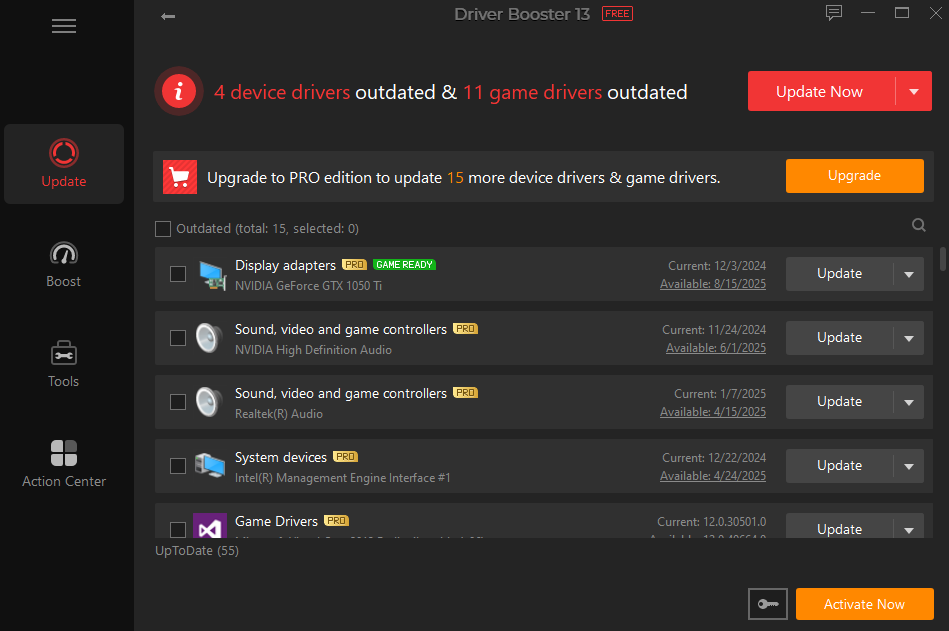
- Once the scan is complete, Driver Booster will provide a list of all outdated drivers you need to update. Choose the “Update All” button to begin the updating process.
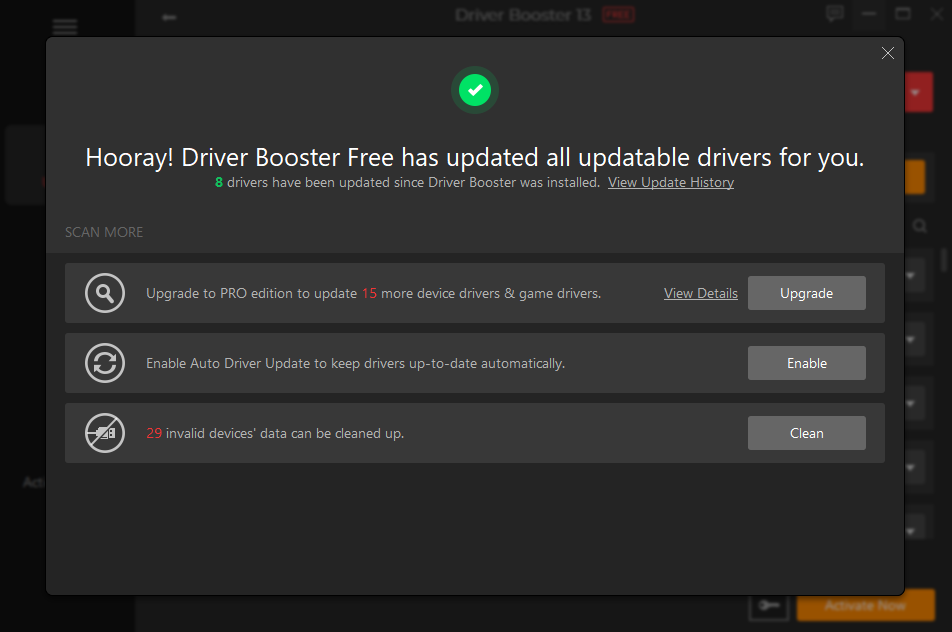
- Within-seconds, the program will update all the outdated drivers. This helps restore your microphone and speakers to normal.
Part 3: Fix 2: Set Correct Default Audio Devices
Driver Booster helps me solve the issue with a single click. However, if your drivers are up to date and you still encounter this issue, you can try this solution. Sometimes Windows automatically switches to the wrong output or input devices. Here is how to set the correct default audio devices:
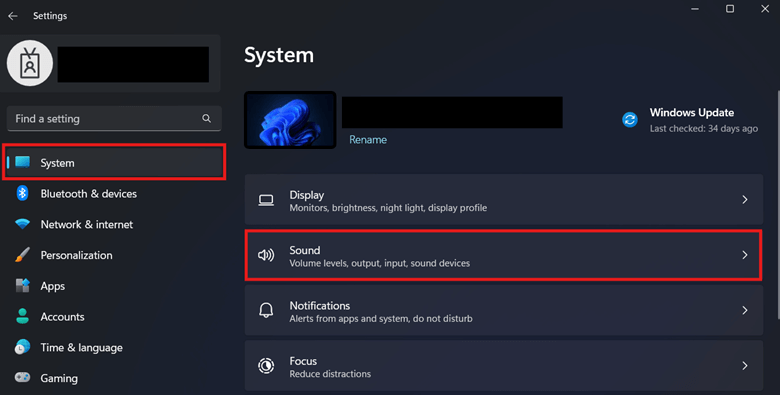
- Press Win+I to open the Windows Settings. Select “System” from the left panel and hit the “Sound” option.
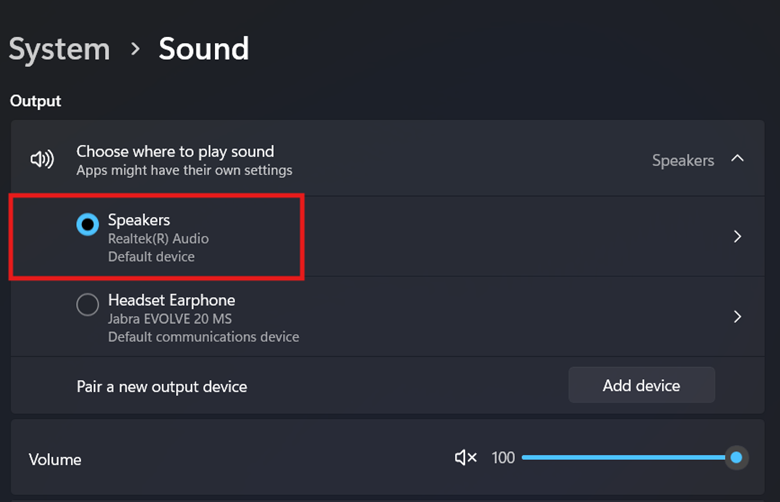
- Under Output, click the “v” icon to expand the “Choose Where to Play Sound” option.

- Now, select the correct default audio device from the list of available options. Once done, apply the changes and test your audio to confirm.
Part 4: Fix 3: Restart Windows
I have also tried restarting Windows, which in many cases helps to quickly resolve audio-related issues. A simple restart can reset the system and clear temporary glitches and bugs. Here is how to do it:
- Click on the “Start” option and select the “Power.”
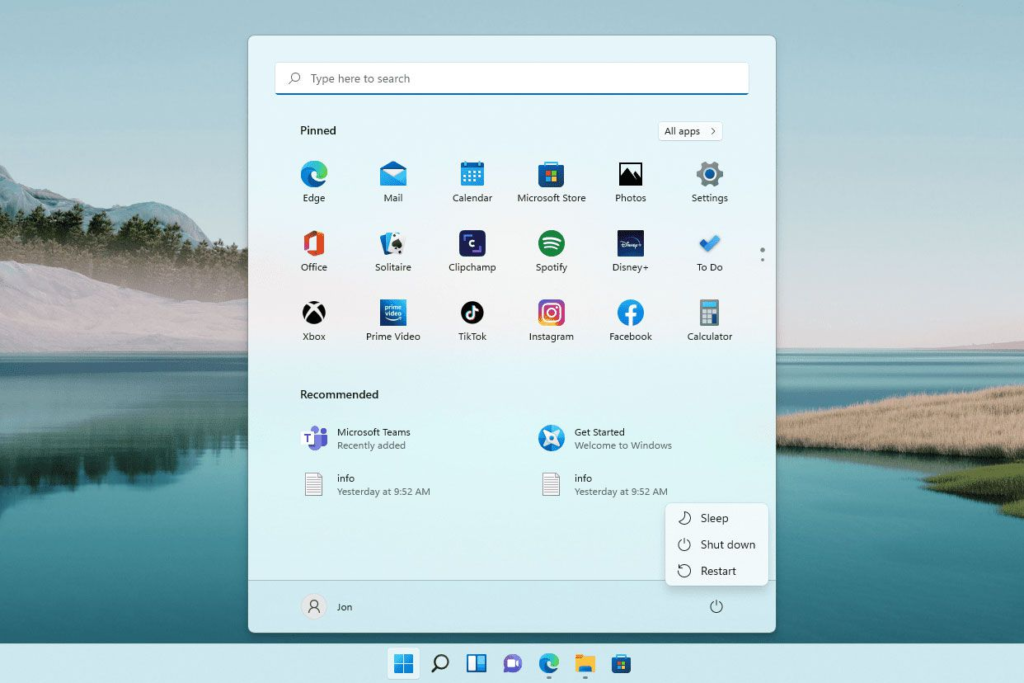
- Choose the “Restart” option and wait for your system to shut down and boot back up.
- Once your PC restarts, check your microphone and speakers again to see if the issue has been resolved.
Conclusion
Fixing the microphone and speaker issues is much easier than it seems. In my case, the main problem was outdated drivers, and using Driver Booster helped me resolve it quickly without any technical hassle. However, if that doesn’t solve your issue, simple fixes like checking default audio devices and restarting Windows can make a big difference.