

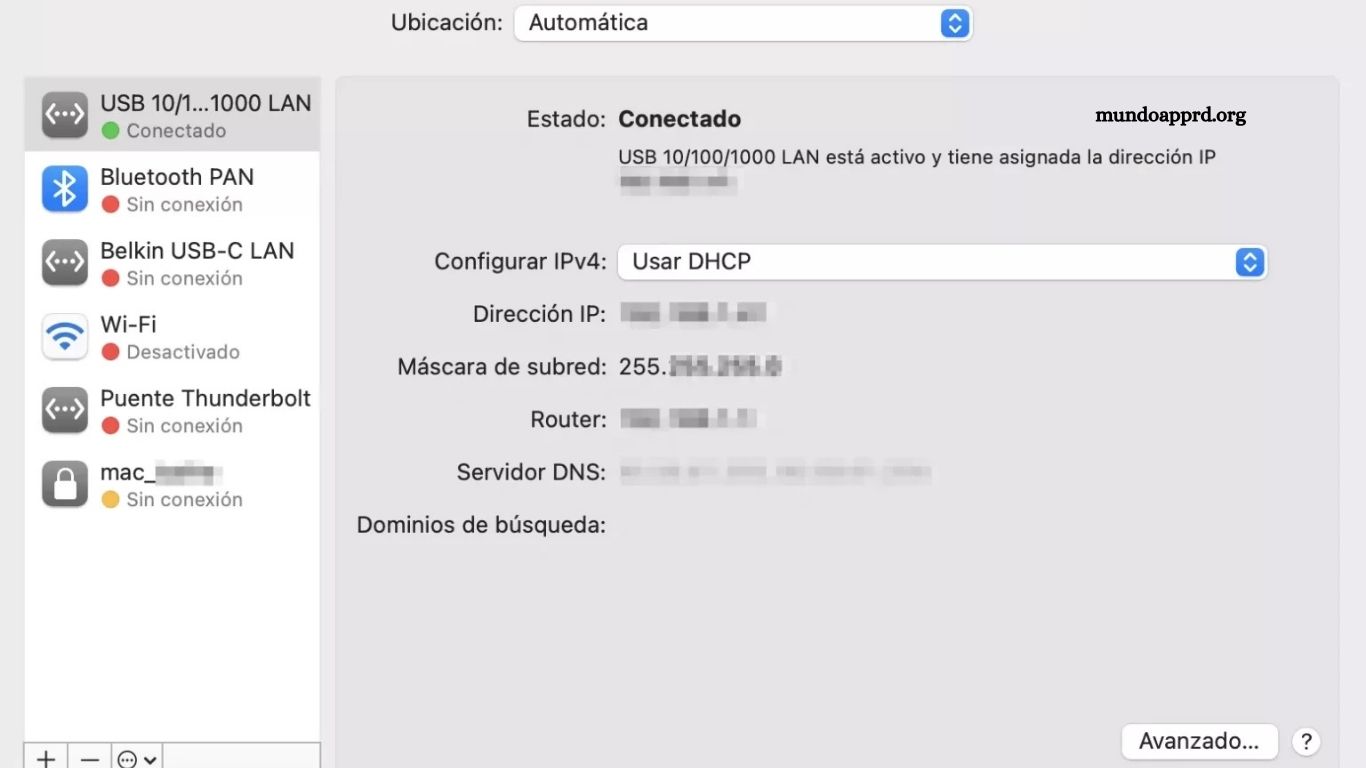
Optimizing DNS settings on Mac provides direct control over internet speed, reliability, and security. Proper configuration ensures faster website loading, reduced latency, and improved overall browsing experience. This guide delivers clear, step-by-step instructions for selecting and applying the most effective DNS servers. Users gain insight into public DNS options, system preferences adjustments, and troubleshooting techniques to maintain optimal network performance.
By following these structured steps, Mac owners can enhance connectivity for work, streaming, gaming, and everyday online tasks. Understanding DNS functionality empowers users to resolve slow connections, prevent interruptions, and increase digital efficiency. Whether adjusting for privacy, speed, or stability, this guide equips readers with actionable knowledge to maximize Mac internet performance immediately.
Read More: Step-by-Step Guide to Setting Up the Tigo APN on Your LG Phone
Configuring DNS on Mac
macOS provides flexible options for managing DNS servers, which handle the translation of domain names into IP addresses. Proper DNS configuration ensures seamless access to websites, faster browsing, and reliable communication with internet resources. By customizing DNS settings, users can optimize network performance, enhance security, and resolve connectivity issues efficiently.
What is DNS?
DNS, or Domain Name System, is a fundamental component of internet infrastructure. It translates human-readable domain names, such as “example.com,” into numerical IP addresses like “192.168.0.1,” which identify the exact location of servers on the internet.
This system enables browsers and applications to locate websites, send data, and establish reliable connections. By resolving domain names efficiently, DNS ensures smooth web navigation, faster access to online resources, and overall stability of internet communications.
DNS Settings on Mac
Configuring DNS servers on a Mac is straightforward. Follow these steps to update your settings:
- Open System Preferences from the Apple menu in the top-left corner of your screen.
- Select Network.
- Choose your active network connection (Wi-Fi, Ethernet, or other).
- Click the Advanced button.
- Navigate to the DNS tab.
- Add desired DNS servers by clicking the “+” button. You can enter multiple servers in order of priority.
- Click OK to save your changes and apply the new DNS configuration.
When Should You Change Your DNS Servers?
There are several scenarios where updating DNS servers on your Mac can be beneficial:
- Performance issues: Slow website loading or connectivity problems may indicate your current DNS server is underperforming.
- Content restrictions: Some websites may be blocked by your Internet Service Provider (ISP), and alternative DNS servers can help bypass these restrictions.
- Privacy and security: Using trusted DNS servers can enhance online privacy and protect sensitive data from tracking or interception.
Always choose reliable and fast DNS servers, as changes can affect domain name resolution and overall browsing speed. Proper selection ensures improved performance and secure internet access.
Frequently Asked Questions
What is DNS and why is it important?
DNS (Domain Name System) translates human-readable domain names into IP addresses. It enables devices to locate websites and communicate over the internet efficiently. Proper DNS ensures faster browsing, stable connections, and reliable access to online resources.
How do I check my current DNS settings on Mac?
Open System Preferences → Network → Advanced → DNS. Your active DNS servers will be listed here.
Can changing DNS improve internet speed?
Yes. Using fast, reliable DNS servers can reduce latency, speed up website loading, and improve overall browsing performance.
Are there security benefits to changing DNS?
Absolutely. Trusted DNS servers can block malicious sites, enhance privacy, and prevent tracking by ISPs or third parties.
What are recommended public DNS servers?
Popular options include Google DNS (8.8.8.8, 8.8.4.4), Cloudflare DNS (1.1.1.1, 1.0.0.1), and OpenDNS (208.67.222.222, 208.67.220.220).
Conclusion
Properly configuring DNS on a Mac is a simple yet powerful way to enhance internet performance, improve security, and maintain reliable connectivity. By understanding how DNS works and selecting fast, trustworthy servers, users can resolve slow-loading websites, bypass restrictions, and protect their online privacy.
